Monday, August 16, 2010

Thrift Store Fabric Shopping

As a beginning quilter it can be very expensive to start building up your fabric collection. I have found a great way to save money and find unique fabrics.
THRIFT STORES!!!!
I am very fortunate to have found a great thrift store that has a consistant selection of new fabrics at really cheap prices. I am not going to reveal the location for selfish reasons!!!!!!
In the past month I have bought $15 worth of fabrics. The fabrics have included scrap pieces as big as a fat quarter, large print fabrics (and we are talking yards of fabric), pre-cut 6.5inch squares with a large piece for backing and even an entire quilt top.

I just completed an adorable quilt that cost me $0.50. NO LIE!

Today I went in there and found the quilt top below, which is perfect for my decor and all the fabrics photographed below. My bill was $3.18.

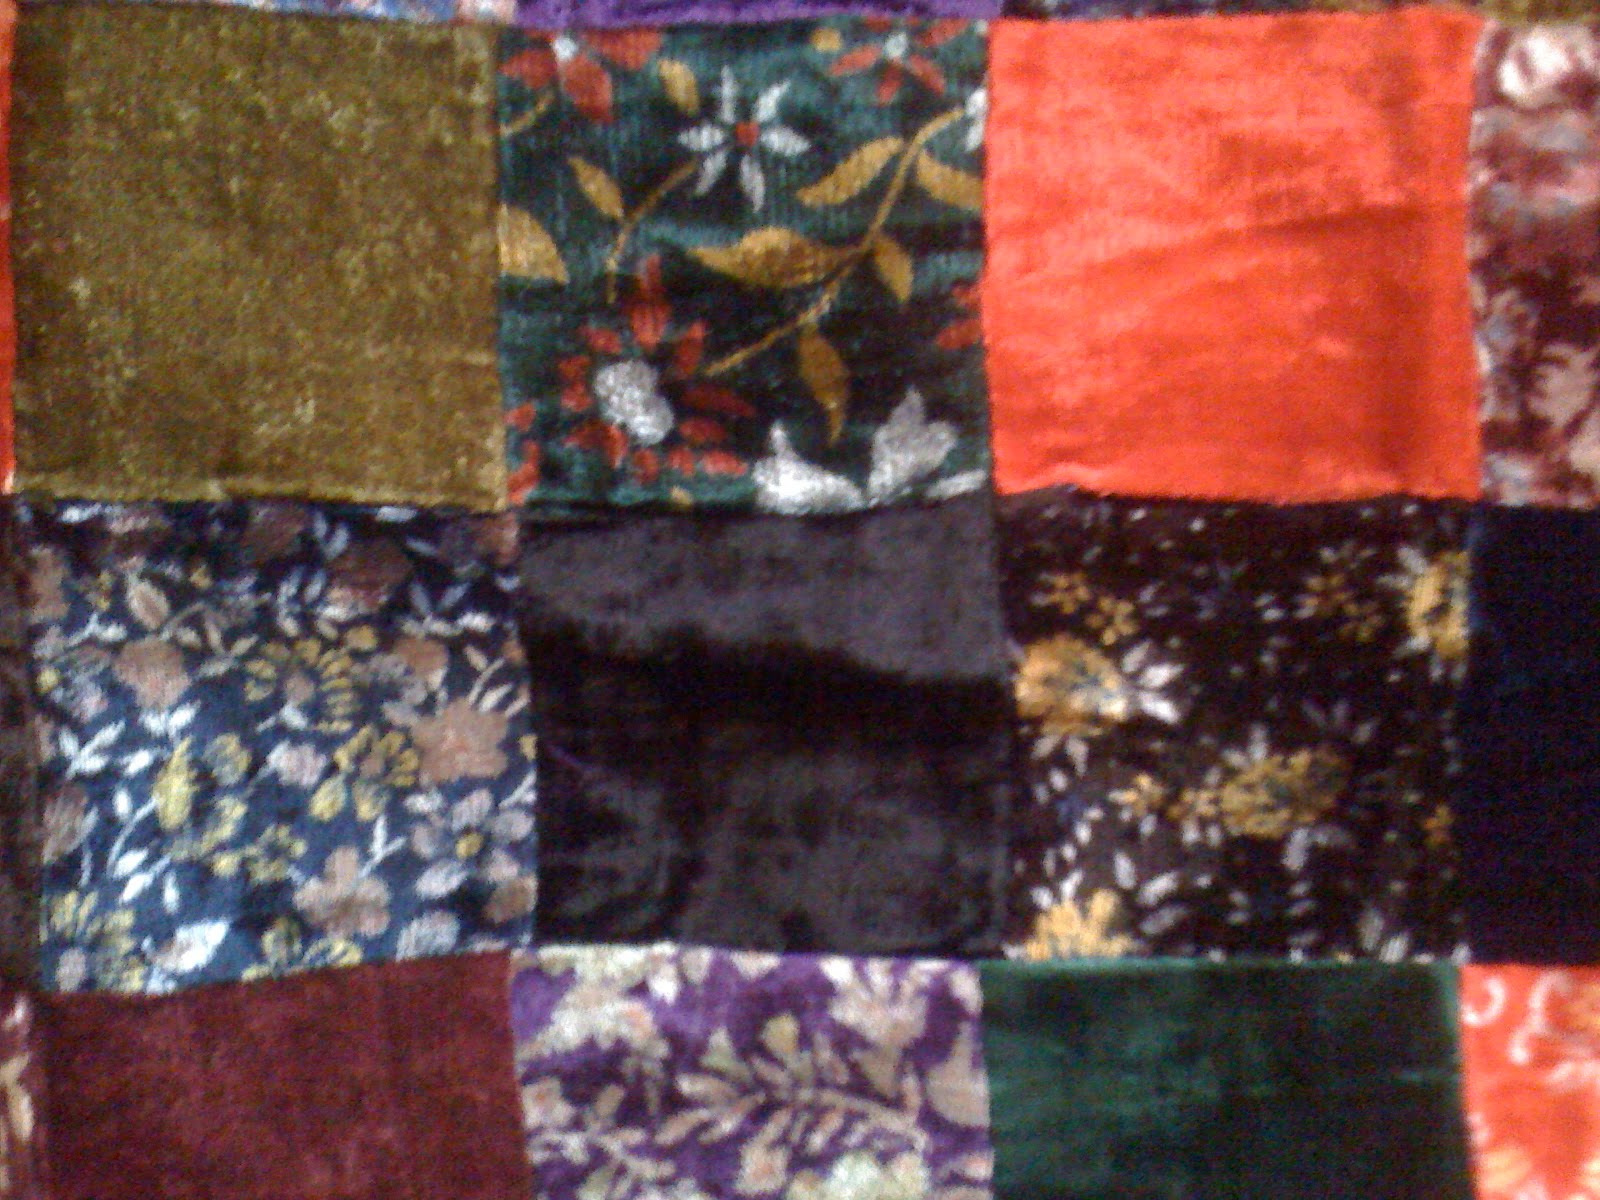
Close up of quilt top (It is all velvety material)
Entire quilt top
All the fabrics I bought

I am a Shark lover and have been looking for shark fabric. I found almost 5 yards of it today! I don't know what I am going to make, but I am excited to figure it out.

In conclusion, I would like to say: Beginners, get out there and start building your fabric stash, even if you don't have lots to spend.

Experienced quilters: Thanks for donating your old stuff. It really helps out beginners.

Something to think about: If you have never donated, consider cleaning out your stash a bit. It really is a great thing to do for the quilt community. That fabric you have and probably will never use, or is left over, might be exactly what some other quilter has been looking for!

Sunday, August 8, 2010

UPDATE: New Blocks for Work In Progress Quilt


I am starting to realize that I must match a patterned print with a slightly solid print to get the effect I want. I am going to be ripping apart the block at the top (all alone) because it is too busy. Each of the fabrics could be the printed fabric of a block with another solid.
All blocks together
Close up of green block.
Close up of red block.
Two new blocks

Thursday, July 29, 2010

Ryleigh's (but really Ashleigh's) Turtle Quilt


While on vacation in Michigan, I decided I wanted to make my friend Ashleigh a quilt for her daughter. Ashleigh's daughter's room is decorated in sea turtles. I had a bit of experience working with sea turtles so I took on the challenge of creating a custom made sea turtle quilt.

I wanted it to be bright and vibrant... but most of all, I wanted to sew with some pink fabrics!

The design has a quilt block in the four corners of the border. I choose Snail Trail in the teal I was using for my water background and a bright pink.

This block was the most difficult block I had ever taken on, THANK GOD for my Mom. She showed me the tips and tricks, like lining up the points of a triangle on one of your lines. In the end... after some ripping and stitching, I felt very accomplished to have this as my final product...

I designed the middle based off a quilt my Mom made for my son which has sea turtle and coral/seaweed on it. Her quilt was much more detailed and also was hand appliqued, but I took the idea and modified it.

My mom and I had been to a quilt show recently and I kept seeing this cool form of quilting. Here is a photo I took while at the show. (If this is your quilt and would like credit please contact me and I will make sure I note your name. I didn't get the name while at the show. )

I decided this technique would look good on the center portion of the quilt. Plus since I was on a bit of a deadline, it would be quick!

I drew a rough sketch of what I wanted the center to look like and started cutting my fabric. The center turned out better than I could have ever hoped for! Take a look...


I don't yet have a photo of the finished product, but I will within days. I learned a new technique for quilting the final product, so look for that in an upcoming blog too!

I will end this blog with the best photo of all! One very happy little girl enjoying her new blanket!

Work In Progress Quilt- First Scrap Quilt

It has been a while, don't worry I am not giving up on the blog... I was on vacation! BUT... I am back now with a lot to talk about, so here we go...

A lot of my quilts are very complex; there is a lot of planning that goes into one of them. With that in mind, I decided I needed a “mindless” quilt to make. This way when the baby is awake at 2am I can quilt without waking my brain up too much!

ALSO… I had been saying since I began quilting that I wanted to put together a quilt composed of the fabrics I had used in quilts I have made for others. This quilt will allow me to use these scraps and remember all the quilts I have made.

I choose the Monkey Wrench (MW) quilt block. I absolutely loved the Snail’s Trail I made for Ashleigh’s Turtle Quilt, and the MW is a version of that.

I also choose this block because my mother had taught me some tricks that made it turn out very neat and even.

So far it is going great! I love the fabrics I have been able to use. I am making 12 inch blocks and plan to use a black fabric as border for the quilt. I feel that each block needs to stand alone verses placing the blocks in a flowing pattern.

Here are the first 5 blocks! Enjoy!!!

UPDATE

Thursday, June 24, 2010

Quilting in the Web 2.0 Generation

I can't believe I didn't think of this earlier! When I heard about it I had a complete "duh" moment.

I found Quilting Apps for my Iphone!!!!

I downloaded one called QuiltFab, which allows the user to punch in some information about the quilt and the app will tell you how much fabric you need. This will come in so handy to a beginner quilter... and the kicker... it is FREE!

I also downloaded an excellent one called, Quick and Easy Quilt Block Tool. It has over 100 quilt blocks in "5 sizes each, with design details and construction diagrams." It is really a helpful app for any quilter!


Sunday, June 20, 2010

Baby Quilt with Applique and Easy Binding


I took an applique class a couple months ago and I finally finished the quilt I started. It is a baby blanket with an adorable teddy bear on it.

I used fusible web to stick the bear on the fabric and then hand stitched a button hole stitch around him.

I wanted to give the teddy bear some depth so that it didn't look like he was just floating in the middle of the quilt. I accomplished this by machine quilting in both horizontal and vertical lines.


I also wanted some areas of the quilt to be puffy so I didn't quilt around eve
ry square.

I finished off with a satin-ish material. I used 3.5 inch strips and ironed about a quarter inch fold along both edges of the material, then I pressed the material in half.
I then "learned as I went" and applied the binding to the out side of my quilt. I probably did it completely wrong, in the traditional sense of binding, but it worked. I used the basic concept formed from looking at the satin finishing on a baby blanket from my childhood. I just looked at how it was sewn on and mimicked it. I don't know if there is a term for this type of finish on a quilt. (If there is and you know it, leave it in the comments).

I am happy with the result. I learned a lot. For example, next time I finish a quilt like this, I will use 5 inch strips. I will also do the corners a bit differently! All in all, I had fun and my baby has a new blanket!


Wednesday, June 16, 2010

Mosaic Quilt Block Class


I have enrolled in a block a month quilting class. It is one of my "mom breaks" for the month. I missed the first class in June so I will be working on two blocks this month.

This class has 12 different blocks that are 12 different techniques. I learned so much this week. We took and cut out squares and rectangles and sewed them together on a diagnal. It was so easy! I never knew working with triangles could be so easy!!!

I also learned handy technique to ensure that you lines and points match up. I wish I could describe it, maybe I will make a video on how to do it! Now there is an idea...

I am extra excited because this is the first quilt I made for myself. I choose colors that are "totally me." This quilt will represent a lot for me and I know I will treasure it!


In summation, the class rocked.

Working with Triangles


I do not know why, but working with triangles intimidates me! So I had to get over this fear of quilts with triangles in them.

I bought this great triangle ruler that included a pattern. I modified the pattern just a little bit, but I officially have my first quilt block with triangle in it. I can't wait to tell you all about the quilt it is for, but that is top secret right now! Check back soon for more details!!!!

Binding Update


I had been procrastinating finishing my Winnie the Pooh wall hanging because I thought the binding would take a long time and be very boring... However, I bit the bullet over the weekend and am happy to report it was actually enjoyable.

I really like hand work that is not super difficult. I like to be able to sort of turn on my auto pilot and hand stitch. For me, I found that doing a blind stitch was perfect for that.

I learned a couple new things too about binding. I learned that I should sew it with the machine onto the back and hand stitch it on the front. I also learned that when you are just learning to bind quilts, give yourself an extra 1/4 inch to work with, heck... go crazy, try 1/2 inch. You will thank yourself later.

I am sure this too, is just one of those things that you learn from sewing, riping, re-sewing and never making that mistake again.

That is me posing with my very first binding. Other than quilting I am also a scrapbooker. I am working on a 365 day photo journal, so I took this photo for that day. It is called Project Life.

Wednesday, June 9, 2010

Machine Stitching My Turtle Applique


I was brave and decided to try to machine stitch my sea turtle (Original Sea Turtle Quilt Blog). I looked up some tips on machine stitching applique patterns and found that it was very important to make sure when turning my fabric I have my needle down on the OUTSIDE of the applique. So with that knowledge off I went. I did two different stitches to give the turtle depth. I am very pleased how it turned out, for my first try at least!

Sunday, June 6, 2010

Crooked Rail Fence- Monochromatic


I needed a wall hanging to go in my bedroom. I am doing a blue and brown theme and could not find anything for a corner wall. I really like the crooked rail fence design. Although I think they look a lot better with a multitude of colors, I was pretty happy the outcome of it in all blue. I am going to put a solid border on it to finish it off, I will post an updated photo when it is done.

This is a fairly easy quilt to make. I used 1.5 inch strips and sewed them together in groups of 8. Then I used a 6.5 inch square ruler tilted to the right or left to get the crooked effect. I followed instructions on this blog. It has step by step instructions and many photos of examples.

Thursday, June 3, 2010

Designing my Turtle Quilt

I have under taken this quilt that I have designed from scratch! I even used my graphic design skills to create a digital pattern.

Here is how it all started... I wanted to make a Sea Turtle Quilt for my son's nursery. I fell in love with this brown pok-a-dotted fabric. I decided it would make a great back. I found some fat quarters that would look go
od with the brown fabric. So I had my center piece fabric, I just didn't have a sea turtle pattern.

Well, I wouldn't let a little thing like that stop me... so I searched online for sea turtle pictures or drawings. I finally found the perfect photo, so I imported it into photoshop and erased the center until I just had the outline
and voila (that is suposed to be that french term, I don't know if I spelled it correct) Anyway, here is what I ended up with.
Once I had my sea turtle ironed onto my fabric, I took a photo of it and imported that into Adobe Illistrator. I then designed how I wanted the final quilt to be. I figured out how I plan to do the boarder and corners. The only difference in the final draft is that there will be a baby sea turtle crawling out of an egg in the upper left hand block.


I have chosen the fabric for the boarder, it will help bring out the blue/teal dots in the brown fabric.


I still have to finish the applique stitching, but I haven't decided if I will do it by hand or machine. I am very excited to get to work on the boarder since it will be the first time I work with triangles!

I went to Fabric Heaven!


This blog is not only to talk about what quilts I design and make, it is also to highlight some of the other reasons that I love quilting.

One of the things I love most about quilting is picking out fabric. I love finding those fabrics that I just have to have. I found one such fabric at a store called The Quilt Place, in Rockledge, Florida. This fabric store has some of the most amazing fabrics! I found one that I just had to make a quilt out of. I don't have a pattern in mind yet, but I just know this quilt is going to be amazing. This quilt is going to scream Niki!

The fabric that I first picked out is the striped one. I just had to have it. Then from there I choose some other dyed fabrics and one more print. I don't know what I am going to do with it yet, but I will keep you posted!

Thursday, May 27, 2010

Applique Class


I had a blast in my applique class. It was such a great experience and it really opened up a lot of doors for my quilting. I now know how to make some much more complex quilts. The photo above is of the bear quilt we made in class.

Binding Class

I went to a binding class and it was very helpful. There is a lot of options when it comes to binding a quilt. This class showed me many ways to finish off my quilts. I would recommend taking a binding class if it interests you.

I have been procrastinating my binding because I am worried it will take forever, and be boring. I will let you know how it goes for me.

I got a new present....


I don't know how I became so blessed to have a friend like Teresa... but she bought me a new sewing machine!!! It came with tons of stitches and a walking foot. It runs so smooth and is so easy to use... Get this... it even has an automatic threading needle!!! Now it is time to start making some quilts that really shine!!!!!

However, I have to admit...it is not just the machine that is going to allow me to make better quilts, I took a few classes (also courtesy of Teresa). I owe her a huge thank you, hmmm maybe I will work on something for her soon!


Monday, May 24, 2010

Winnie the Pooh Book Turned Wall Hanging


I wanted to decorate my son's room in Classic Pooh. I figured I would make him a one of a kind wall hanging/ quilt. I didn't have a clue if I could find any fabric, but I found something better. There was a roll of fabric that had a pattern for a plush Winnie the Pooh book. It had the perfect size blocks and everything!!!!

I chose a boarder fabric and was on my way!!

I did have to get a bit innovative with this one because of an uneven number of blocks. There were 12 blocks, but one of them said, "this book belongs to" so I couldn't use it. I could use the pooh and piglet that were on the block, so I cut them out and used fusible webbing to attach it and stitch around it. Then I embroider a message for my baby where the book writing would normally be. I thought it was a creative save!


Baby Blanket w/ Multiple Textures

This one is a kit that I bought. I just fell in love with the fabrics! It has a really soft plush material (solid brown) and some neat fabric. I would probably never buy another kit like this though, because they over charge and give you the bear minimum.

For this quilt, I didn't like the fabric they provided for the center so I choose a different one. Plus since I had an extra fabric piece I made this larger than the instructions. I just had to do some simple math and figure out my lengths.

I actually was not the one to make up this new design. Josh (my fiancee) basically designed this quilt for the baby. I let him make all decisions including what to put as backing. He choose an unconventional backing... terry cloth. This way the quilt is multifunctional. It can be a blanket or a towel!

I still have yet to finish quilting this one. It was going to be my first machine quilted quilt, but I needed a walking foot. So this is put on hold until I get one....

Bright Hopes Block- Quilt #2 and 3

The next quilt I tried was this one called a "Bright Hopes" block. I made this one for my amazing nephew Cole, he was only one month then! He is 6 months now, where does the time go... any way...
This is a great beginner blo
ck. You do have to learn how to sew partial seams.

DON'T FREAK OUT!

They are fairly simple. I used instructions online that take you step by step. They will have you sewing beautiful partial seams in no time. The directions are very easy to follow! Good Luck!

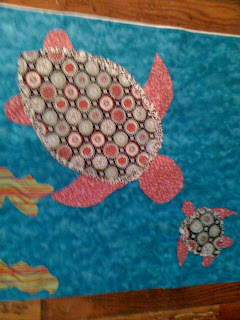
I also made this quilt in a bright pink design. This design is so versatile!

This block requires 5 colors. I used 3.5x6.5 inch blocks and a 3.5x3.5 block in the center. I used 2.5 inch boarder material.

9-block- MY FIRST QUILT

This is the first quilt I made in December 2009. It is a simple 9-block quilt, that I would recommend for any starter. I did not use binding on this quilt and I tied it off. So technically I have heard this means it is called a "comforter," but to me it is a quilt. The first quilt I made my baby.

Steps I followed:
Picked out one light, dark and medium fabrics.
Ironed fabric
Cut 3.5 inch strips, cut 3.5x3.5 blocks. I figured out my arrangement and began sewing strips of three squares with a 1/4 seam. Once I got three strips of three squares I sewed them together. I used a 1.5 inch boarder between blocks.

Fairly simple, but I was so proud when I finished it.

P.S. Please forgive my lack of knowledge in the terminology department... remember, beginner! LOL
Till next time... sew on!

Welcome Message

Hello All,
I am a beginner quilter! I began quilting 6 months ago while I was pregnant. I feel in love with it. I am a graphic artists and I have found that I use my skills with digital design a lot in my quilting. I have a journal that I also use to create quilt designs. I have a lot of ideas that I want to try. I am the type of person that takes and idea and thinks why can't I do this to it? I basically just want to brag about my quilts and discuss my trials and triumphs on my journey to learn to quilt. I welcome all discussions and ideas!! Thank you for checking out my blog. MORE TO COME SOON!!!!!!!!!!!!