Sunday, January 30, 2011

Prayer Quilt


I recently became friends with Mary, a wonderful girl who is going through a really rough situation. He mother is ill and in an extended care treatment facility. Mary is has the power of attorney with her mother and she is struggling to take care of her mother, visit her, make decisions regarding her care, and ensure that her mothers affairs are in order. On top of that she works a full time job and is involved with a group that meets daily. To say the least, Mary is a very busy woman!

When a person in my life is having a hard time, I always want to help. At the very least, I want to make sure they know that I am thinking and praying for them.

Back in 2006 I had a horrible accident, broke my knee in 3 places and required surgery. My Mother's church sent me this beautiful prayer shaw that I wrapped around my shoulders while I was healing. Even to this day, I grab my shaw when I am feeling down or a bit lonely. It always makes me feel better.

Another great thing about the prayer shaw is that it told me that my Mom had people in her life that cared enough about HER to give ME something. As a Mother, I am sure that Mary's Mother is worried how her daughter is handling her illness. I wanted Mary's Mother to know that she had people who cared about her and were there helping her through this tough time.

So I immediatly began to think about this shaw and it dawned on me... Why not make a prayer quilt?

DUH Nichole!

So began my journey on this quilt.

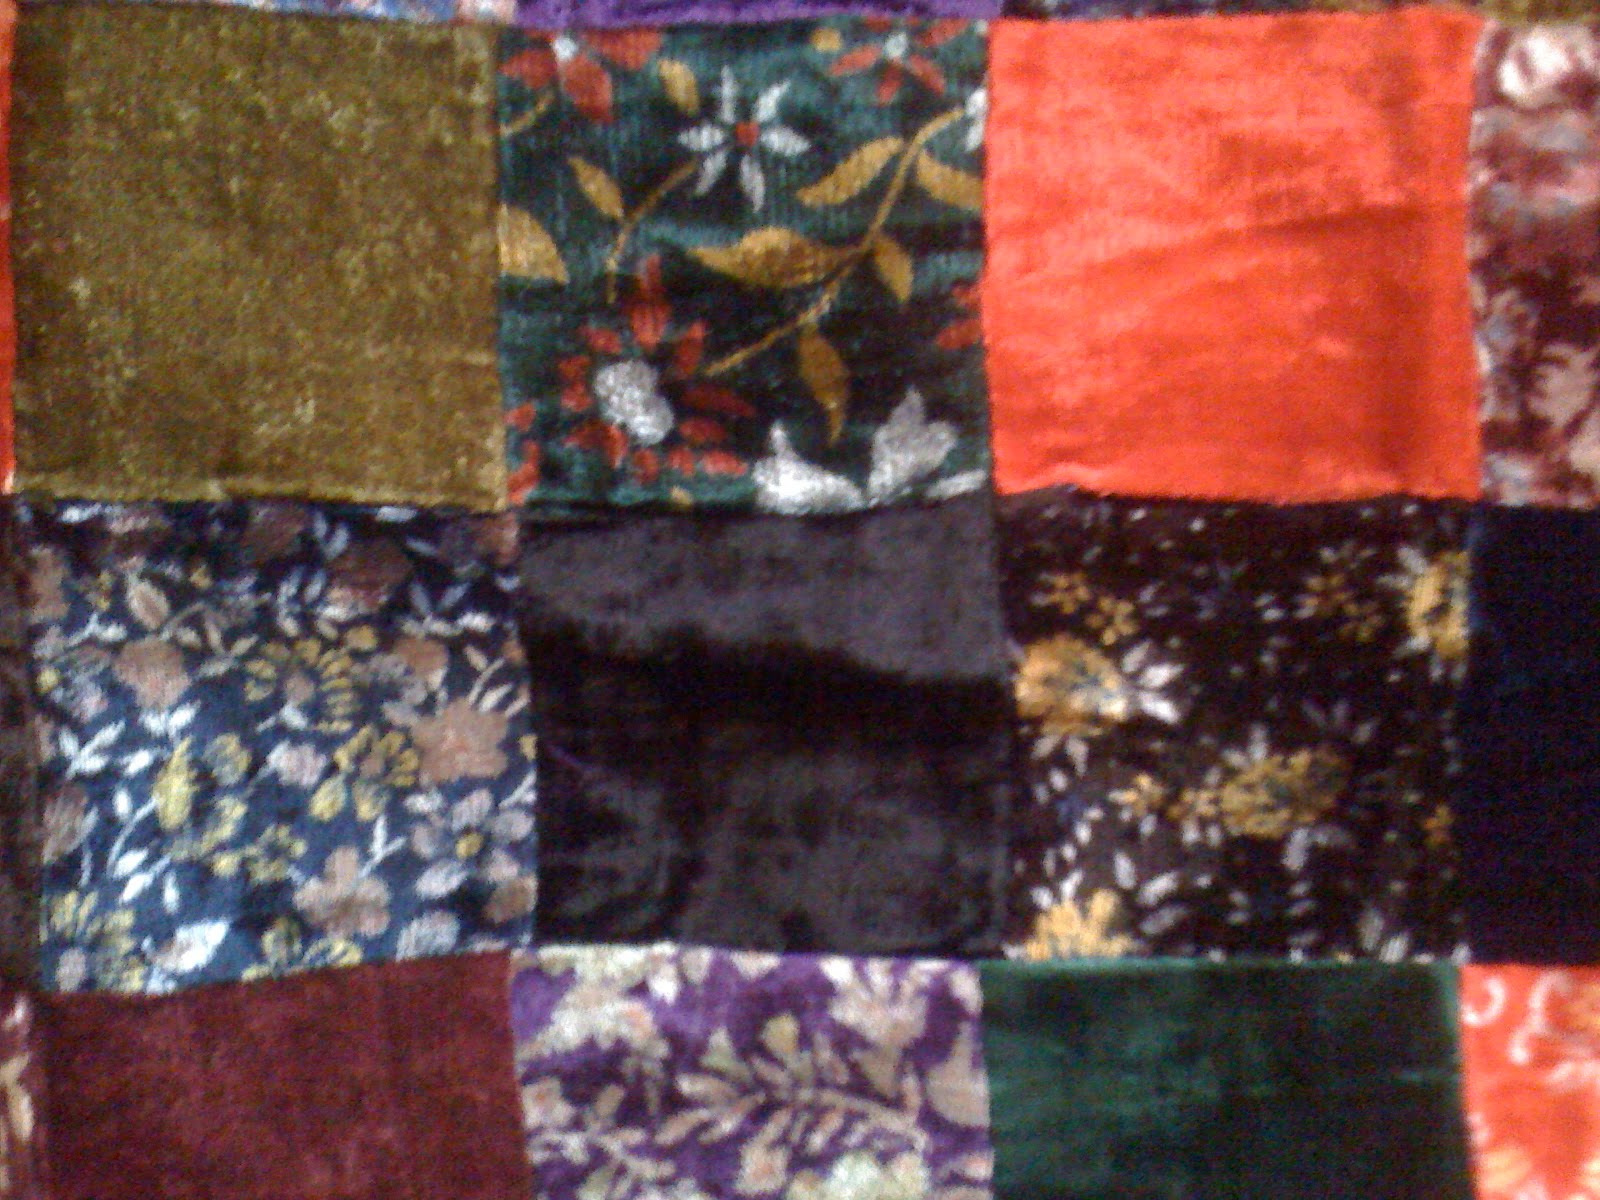
I prayed every step of the way, from choosing my fabrics to deciding on a fleece backing because it was warmer and this was only a lap quilt. I prayed for health, serenity, peace, healing, love, warmth... anything that came to mind.

Mary loved the quilt! There were a few tears and I couldn't have felt better!

Monday, August 16, 2010

Thrift Store Fabric Shopping

As a beginning quilter it can be very expensive to start building up your fabric collection. I have found a great way to save money and find unique fabrics.
THRIFT STORES!!!!
I am very fortunate to have found a great thrift store that has a consistant selection of new fabrics at really cheap prices. I am not going to reveal the location for selfish reasons!!!!!!
In the past month I have bought $15 worth of fabrics. The fabrics have included scrap pieces as big as a fat quarter, large print fabrics (and we are talking yards of fabric), pre-cut 6.5inch squares with a large piece for backing and even an entire quilt top.

I just completed an adorable quilt that cost me $0.50. NO LIE!

Today I went in there and found the quilt top below, which is perfect for my decor and all the fabrics photographed below. My bill was $3.18.

Close up of quilt top (It is all velvety material)
Entire quilt top
All the fabrics I bought

I am a Shark lover and have been looking for shark fabric. I found almost 5 yards of it today! I don't know what I am going to make, but I am excited to figure it out.

In conclusion, I would like to say: Beginners, get out there and start building your fabric stash, even if you don't have lots to spend.

Experienced quilters: Thanks for donating your old stuff. It really helps out beginners.

Something to think about: If you have never donated, consider cleaning out your stash a bit. It really is a great thing to do for the quilt community. That fabric you have and probably will never use, or is left over, might be exactly what some other quilter has been looking for!

Sunday, August 8, 2010

UPDATE: New Blocks for Work In Progress Quilt


I am starting to realize that I must match a patterned print with a slightly solid print to get the effect I want. I am going to be ripping apart the block at the top (all alone) because it is too busy. Each of the fabrics could be the printed fabric of a block with another solid.
All blocks together
Close up of green block.
Close up of red block.
Two new blocks

Thursday, July 29, 2010

Ryleigh's (but really Ashleigh's) Turtle Quilt


While on vacation in Michigan, I decided I wanted to make my friend Ashleigh a quilt for her daughter. Ashleigh's daughter's room is decorated in sea turtles. I had a bit of experience working with sea turtles so I took on the challenge of creating a custom made sea turtle quilt.

I wanted it to be bright and vibrant... but most of all, I wanted to sew with some pink fabrics!

The design has a quilt block in the four corners of the border. I choose Snail Trail in the teal I was using for my water background and a bright pink.

This block was the most difficult block I had ever taken on, THANK GOD for my Mom. She showed me the tips and tricks, like lining up the points of a triangle on one of your lines. In the end... after some ripping and stitching, I felt very accomplished to have this as my final product...

I designed the middle based off a quilt my Mom made for my son which has sea turtle and coral/seaweed on it. Her quilt was much more detailed and also was hand appliqued, but I took the idea and modified it.

My mom and I had been to a quilt show recently and I kept seeing this cool form of quilting. Here is a photo I took while at the show. (If this is your quilt and would like credit please contact me and I will make sure I note your name. I didn't get the name while at the show. )

I decided this technique would look good on the center portion of the quilt. Plus since I was on a bit of a deadline, it would be quick!

I drew a rough sketch of what I wanted the center to look like and started cutting my fabric. The center turned out better than I could have ever hoped for! Take a look...


I don't yet have a photo of the finished product, but I will within days. I learned a new technique for quilting the final product, so look for that in an upcoming blog too!

I will end this blog with the best photo of all! One very happy little girl enjoying her new blanket!

Work In Progress Quilt- First Scrap Quilt

It has been a while, don't worry I am not giving up on the blog... I was on vacation! BUT... I am back now with a lot to talk about, so here we go...

A lot of my quilts are very complex; there is a lot of planning that goes into one of them. With that in mind, I decided I needed a “mindless” quilt to make. This way when the baby is awake at 2am I can quilt without waking my brain up too much!

ALSO… I had been saying since I began quilting that I wanted to put together a quilt composed of the fabrics I had used in quilts I have made for others. This quilt will allow me to use these scraps and remember all the quilts I have made.

I choose the Monkey Wrench (MW) quilt block. I absolutely loved the Snail’s Trail I made for Ashleigh’s Turtle Quilt, and the MW is a version of that.

I also choose this block because my mother had taught me some tricks that made it turn out very neat and even.

So far it is going great! I love the fabrics I have been able to use. I am making 12 inch blocks and plan to use a black fabric as border for the quilt. I feel that each block needs to stand alone verses placing the blocks in a flowing pattern.

Here are the first 5 blocks! Enjoy!!!

UPDATE

Thursday, June 24, 2010

Quilting in the Web 2.0 Generation

I can't believe I didn't think of this earlier! When I heard about it I had a complete "duh" moment.

I found Quilting Apps for my Iphone!!!!

I downloaded one called QuiltFab, which allows the user to punch in some information about the quilt and the app will tell you how much fabric you need. This will come in so handy to a beginner quilter... and the kicker... it is FREE!

I also downloaded an excellent one called, Quick and Easy Quilt Block Tool. It has over 100 quilt blocks in "5 sizes each, with design details and construction diagrams." It is really a helpful app for any quilter!


Sunday, June 20, 2010

Baby Quilt with Applique and Easy Binding


I took an applique class a couple months ago and I finally finished the quilt I started. It is a baby blanket with an adorable teddy bear on it.

I used fusible web to stick the bear on the fabric and then hand stitched a button hole stitch around him.

I wanted to give the teddy bear some depth so that it didn't look like he was just floating in the middle of the quilt. I accomplished this by machine quilting in both horizontal and vertical lines.


I also wanted some areas of the quilt to be puffy so I didn't quilt around eve
ry square.

I finished off with a satin-ish material. I used 3.5 inch strips and ironed about a quarter inch fold along both edges of the material, then I pressed the material in half.
I then "learned as I went" and applied the binding to the out side of my quilt. I probably did it completely wrong, in the traditional sense of binding, but it worked. I used the basic concept formed from looking at the satin finishing on a baby blanket from my childhood. I just looked at how it was sewn on and mimicked it. I don't know if there is a term for this type of finish on a quilt. (If there is and you know it, leave it in the comments).

I am happy with the result. I learned a lot. For example, next time I finish a quilt like this, I will use 5 inch strips. I will also do the corners a bit differently! All in all, I had fun and my baby has a new blanket!